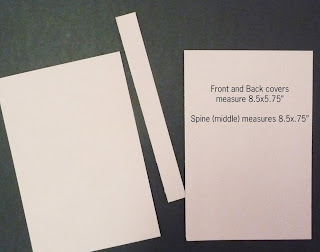
1. Cut three pieces of mat board or corrugated cardboard or any other sturdy fiberboard. The front and back covers match, each measuring 8.5” by 5.75” (these measurements are for the Kindle 1&2 or a 5x8” notebook). Cut another skinny piece for the spine measuring 8.5” x .75”.
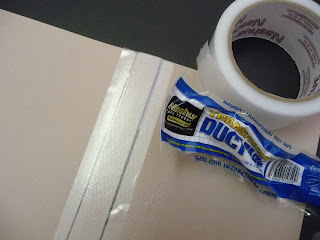
2. Arrange them together in a straight line horizontally, leaving a small space between the covers and the center spine piece. Tape them together carefully. I love using transparent duct tape. It’s strong, flexible and non-toxic.
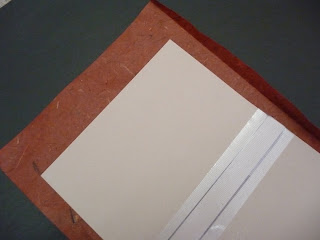
3. Cut a piece of decorative paper at least an inch wider all around than your book base and glue the cardboard to the paper, centering it.
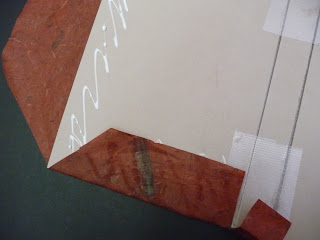
4. Cut the corners at a 45 degree angle to the edges of the board. Cut vertical slits at the spine from the outside to the edge of the board. Fold everything in neatly and glue it.
5. Turn the covered board over and fold the cover in a out a few times to make sure they open and close well. Now comes the fun – lay the cover flat and collect your collage materials. You can use tissue paper, magazines, or your own photos that you have printed out on plain paper on your computer. Think about coordinating colors and themes.
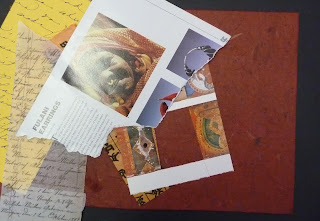
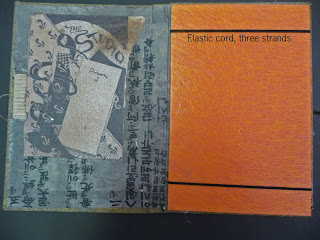
6. When you are satisfied with your cover design, cover the inside with a piece of decorative paper slightly smaller than the outside of the cover. Cover a separate piece of board, 8.25x5.5” with more paper, and tie elastic cord at the top and bottom, wrapping it around and fastening it at the back. Glue this piece which will hold you e-reader or notebook to the right inside cover.
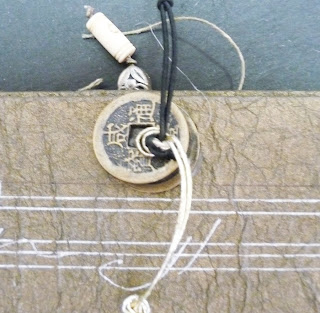
7. There are a lot of ways to fasten your book – simple ribbon works, as do buttons. I use gold and silver elastic cord that attaches to the back and stretches over the clasp at the front cover edge.
8. When you are finished, it’s a good idea to spray your collaged cover with a clear acrylic finish made especially for paper and available at craft stores.
You are welcome to look at my covers on my Etsy Gallery to get ideas. If you make a special one that you’d like to share, email a photo to me and I’ll post it on my blog.
